For the last 6 months I have been the chosen photographer for young apartment-rental entrepreneurs Feyi and Precious, owners of First Stay Apartments. ‘First Stay’ now have 6 locations in Birmingham city centre, and are acquiring new properties to rent on short term leases – that are perfect for business meetings, or city breaks.
They have created a brand that they are looking to grow fast, with each property decorated and kept to the same high standards. As a result, they want to keep to one photographer to take all the photos, using the same techniques, equipment and editing processes throughout – thus keeping their website and branding clean and regular
Property photography seems to be less about being creative, and more about eliminating mistakes. Any photographer can pick up a wide angle lens for their camera, and think the job will suddenly be easy. However, wide-angle lenses come with their own problems to conquer, on top of everything else that is so important in a property portfolio
For example problem 1, if you photograph a room with a super-wide lens (like the Canon 11-24mm f4L USM) items and furniture like sofas and televisions warp and stretch horribly in the corners – (don’t even try this lens on people!) So, you often have to rearrange a room through the lens, moving furniture more centrally, whilst trying to keep lines perpendicular. Whilst a room layout may be perfect for a guest, it may look messy and chaotic through a lens – especially one as unforgiving as the 11-24mm.
As a result, I usually arrange a room within the central 80% of the image, and then crop out the sides. This lens is also so wide that it can almost see round corners (really!) and actually chopping parts of an image out, and not showing the entire room actually gives the impression the room is larger than using the whole of the 11mm wide angle view.
I always shoot interiors a f14/f16, and will use a fast prime like a 35mm f1.4 for little details, blurring out the background. Shooting at f14 and a low ISO means shutter speeds of around 1/2 second. Obviously a tripod becomes essential for such long shutter speeds, but it also helps eliminate issue no.2:
Photographing straight on: Don’t use a tripod to get your horizontal line correct, just to then photograph slightly up/down into the image. What looks normal to your eyes, looks very unappealing and weird on a screen. Shoot straight in all directions! This often means changing the height of your tripod for each shot, to keep all lines straight whilst being able to look over tables, beds and countertops.

The next problem to overcome for those new to this field of photography, is to eliminate shadows. Having dark areas of shadow in photos, especially above counter tops and away from windows, makes the room look ugly and dingy. To keep everything bright any sparkly, I use the simple method of firing a flash at the ceiling in most photos, illuminating the room equally from above. However, the best angle for this is not always to keep the flash on-camera, and so I use a wireless trigger system. In larger (or more challenging rooms) I will often use 2 flashes at different power outputs, filling in the darkest area of a room


Above: Keep lines straight whenever possible
Use a prime lens for the little details

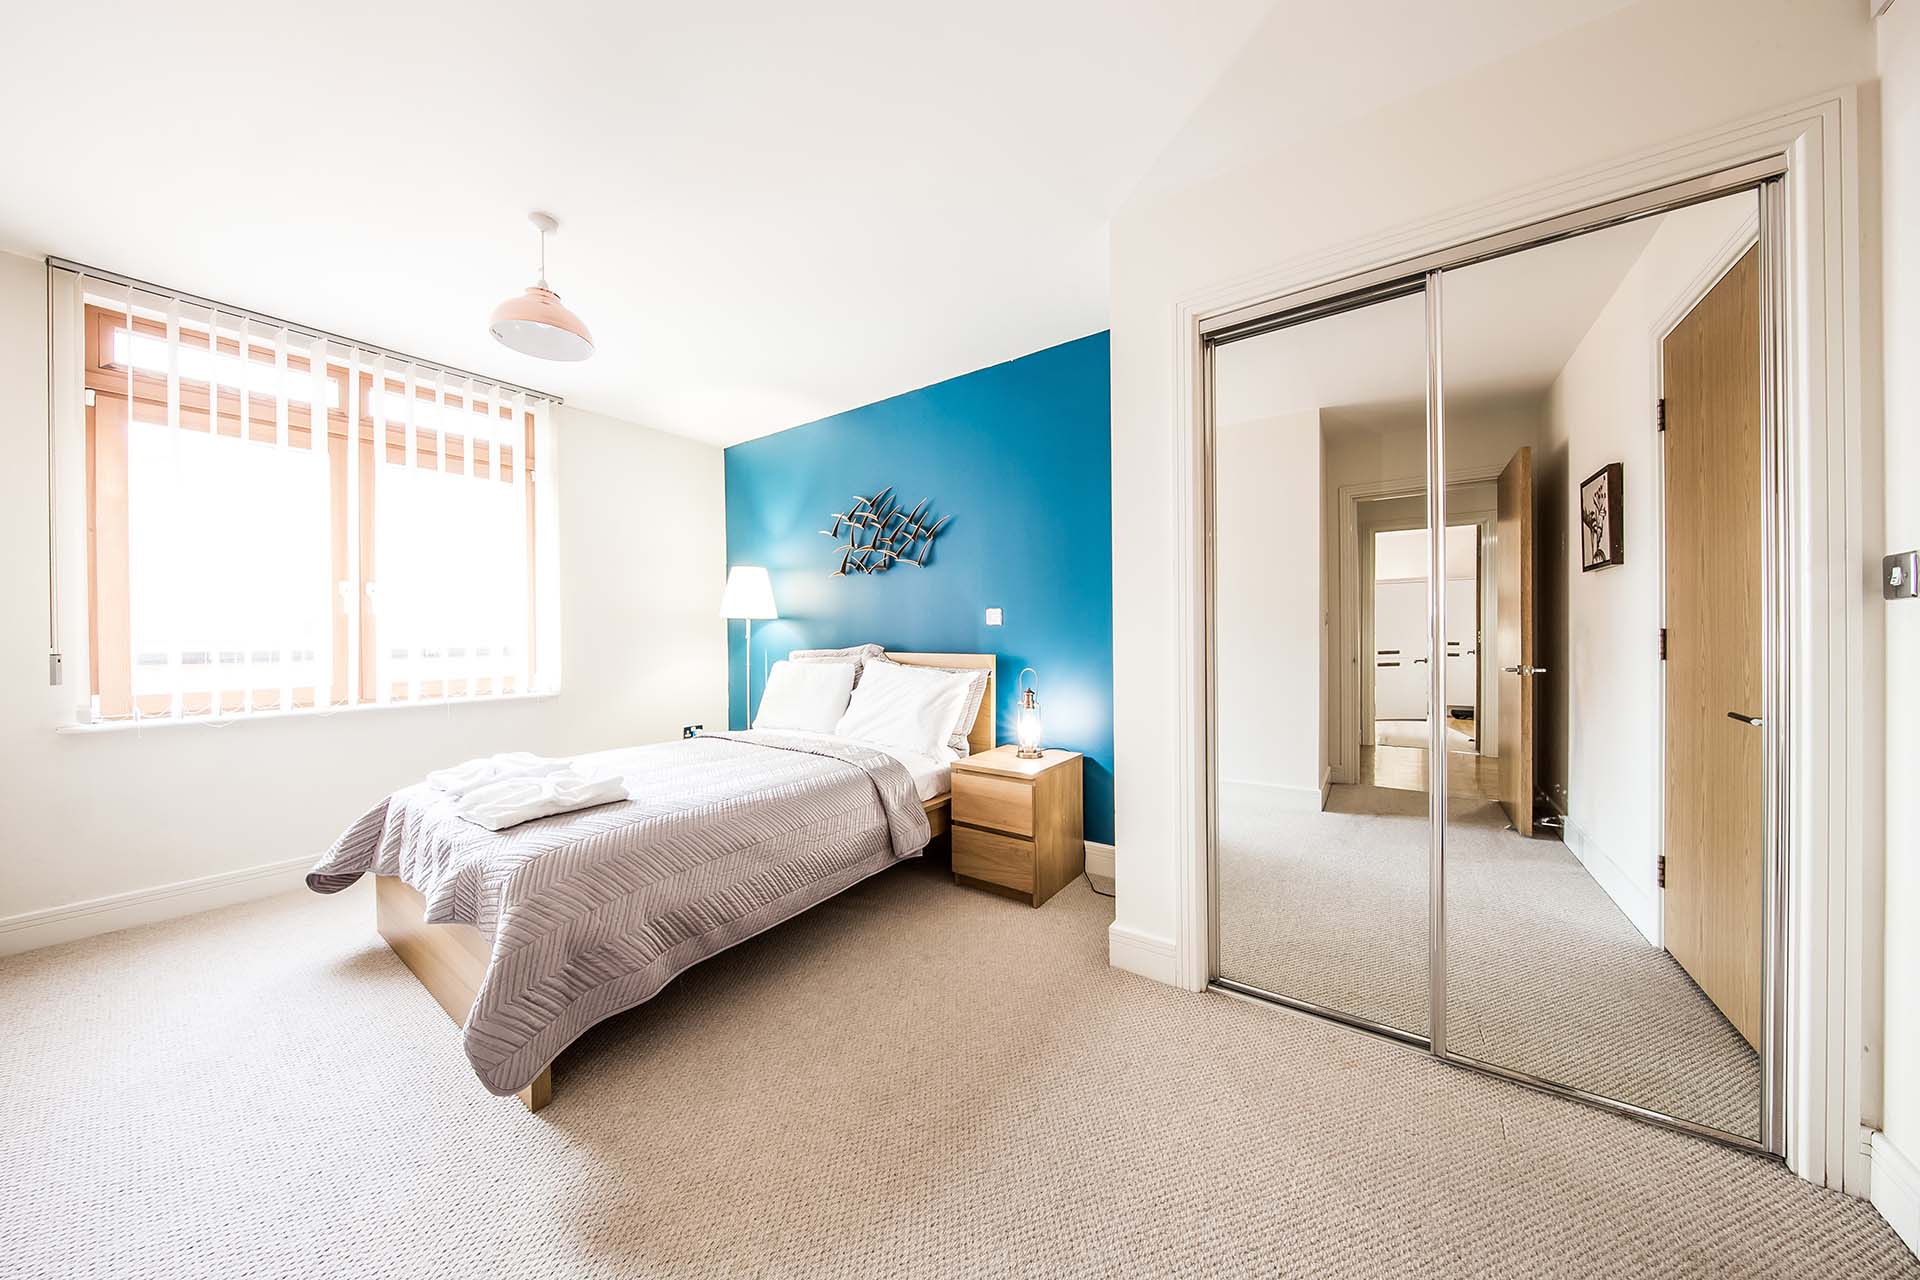
With camera reflections edited out
The final big issue to overcome is a little more tricky: Reflections. Sometimes these are in appliances, like microwaves or kettles, but the worst culprits are of course mirrors
To be honest, if you want to shoot a room straight-on, keeping counter tops and sinks in the shot (and you should), you will need to find an angle in your room where you can’t see yourself or the camera reflecting back at you. But some rooms do not give you the space or angle to do this, so this is what I do:
I will line up the photo as best I can, ignoring the camera in the mirror (see left photo). To reduce editing, I will put the camera on a 10 second timer, and close the door behind me, so at least I am not in the photo myself – and the door is shut
Back on the computer, I will use Photoshop to carefully edit out the camera reflection, and replace it with the surrounding area’s texture. Thus, it is best to shoot with the camera on a plain, consistent background, that is easier to fill in afterwards. Wood is quite easy to manipulate on Photoshop, so this is often my preferred choice – but also see cover photo for more complex editing